
The ORIGINAL ChiyoDad and a Close Game
Azuma Kiyohiko
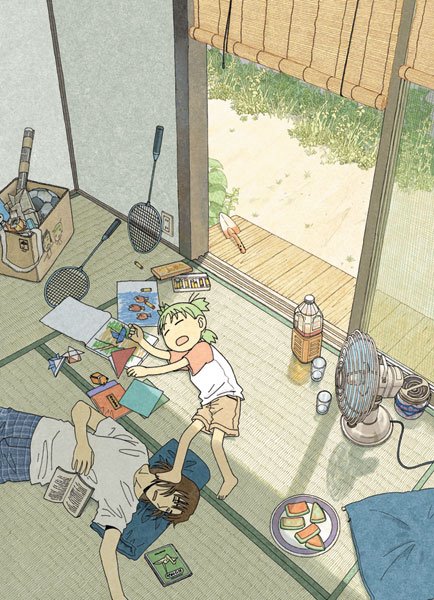 Artwork for the 4th book of Yotsuba to ...
As some of you have correctly suspected, ChiyoChan and I very much enjoy the comics of Azuma Kiyohiko, the creator of the mangas known as Azumanga Daioh and Yotsuba to ... . The two of us think that Azuma-sensei's work is comparable in spirit and hilarity to Charles Schulz's (another cartoonist that inspires the two of us). If you have kids (especially daughters), you'll probably find these manga to your liking as well.
On one of those aforementioned websites, you'll find the the original Chiyo-Dad which appears prominently in the Azumanga Daioh as some sort of mascot. I had adopted this character last year as my avatar and nome de plume on another forum because someone before me had already taken the Totoro. It's since carried over to this blog and notably been changed in form (having gone from a cat-plushie to some sort of cat-penguin-plushie).
You can sample two of Azuma's works, Try! Try! Try! (the comic-strip version of Yotsuba to ...) and Wallaby, on MapoRed Manga.
A rescue and, perhaps, capture?
In my Thursday evening match on KGS with Aegerin (20k), I won by just half a point. That's only the second time that has happened to me (the first being in an old match I had with OrangeKyo).
seathief (19k) was watching and he believed that I might have been able to save a group of imperiled stones that was on the left side of the board. The board diagram below is where I think that opportunity last made itself available but I couldn't read the moves. Maybe you can.
The objective would be to save at least the C9 group (and perhaps accomplish more).
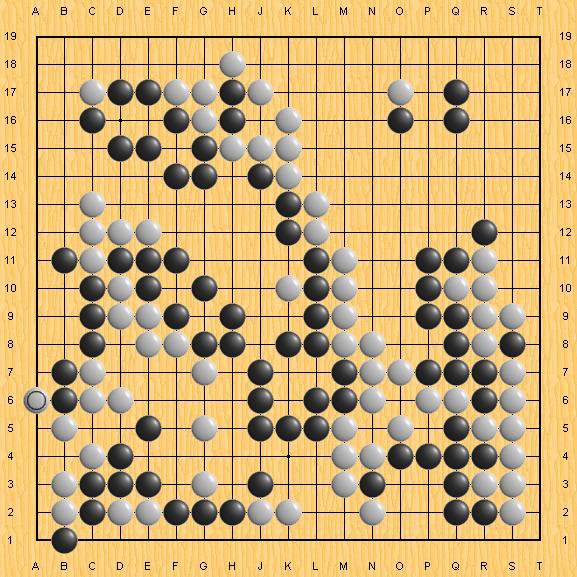 Black to play. Can the C9 group be secured or rescued?
posted by ChiyoDad @ 7:14 PM
12 comments
![]()
![]()


12 Comments:
hi, IMVHO, it can be rescued, key points for both sides being B9 after you protect at A8 against A6 and for black, the F7 cut will be severe against white where a series of snap backs is possible and the white group is without sufficient eyes to live and black can stage to capture these white stones as well.
in the original game sequence, after white D8, black B9 lives.
I may have misread. please correct me if wrong :)
After bB12, he should live easily. wB8 will capture the 2 stones, but bB9 will live. If white tries to capture the whole group with B9, bB8 gives black the option of either pushing out along the B line or playing A9 to make 2 eyes. This will finish off C12 and make for an easy game. If I were white i'd consider playing B12 instead of A6 and threatening to kill while trying to make life for the C12 group.
If you're looking for a fun move, F6 cuts off at least 2 of the stones on the G line, and will make quite a few point. Still more urgent to save the group on the side though...
hi, yup, in any case, black's group seems to be save-able and inflict damage to white's thin position. What will happen if white plays B13 after Black B12 instead of trying to capture that B6,B7 stones?
After white plays A6, I think black is dead locally. When black played A8, white should answer B9.
Black should have played B9 instead of D4, to make sure of his own group's life.
Have you considered putting these game type questions on Sensei's BQM?
Hdoong, if wB13 after bB12, black will then play a8 and live. White cannot play B9 afterward since black can simply play A9. If black is looking to make a move before wA6 to secure his group, B12 is better than B9 because it cuts off white from the wall and should be all is needed to kill the C12 group.
Very neat problem by the way. You should consider putting some variation of this up on goproblems.
Hi, it still looks like one eye with a white hane at A12 and it still looks like Black has to exploit White's weaknesses to secure the group.
I have never imagined the possiblity of a game discussion via a blog entry. This is very good and interesting :))
Let's have more of these ;)
So far almost every suggestion was wrong. a8 was the correct response to a6. If white still tries to kill with Wb12, Bb9, Wa11, Bb10, Wa10 then after Be7 white cannot rescue the cutting stones at e8 so all White stones on the left are dead.
b12 instead of a8 is bad, because white can live easily by capturing two stones at b8.
It's true that d4 was a bad move, but instead of just living on the left black can play Bd5, Wc5, Be6 and White is dead.
Hdoong, sorry about the incorrect move after B12. If bB10 after wB13, B8 B9 makes A8 and A12 miai for life.
Bitti, if bE7 after the listed variation, white can connect at F7, bE6 wE5 and white should win the semeai easily. If black lives simply and lets white live on the bottom, killing C12 will make for an easy victory for black.
Of course I may be completely wrong, feel free to list additional variations.
We5? But there's already a stone? I assume you mean the bamboo connection at f5 instead. But there is no semeai because then (if Wf7, Be6 is exchanged) Black simply connects at d7 (c5 and d8 are miai).
Ahh, i had seen that but forgot about it when i was working through the semeai. Since bE6 is forced after wF7, white is first to be able to play C5. Even with the setback of having to play that i still see white as at least 1 liberty ahead. These variations are rather difficult for me to read out quickly though. If I were to play in the actual game, I would prefer to live simply killing the C12 group, which would put black plenty far enough ahead of white to win easily...
Seems your problems in reading are not only in actual games. If white c5 after Be7, Wf7, Be6 black simply squeezes with Bd7, Wd8, Bg6, Wf6, Bf5, Wh6, Bh6, Wf6, Bg4. Thats a basic tactic. You should practice reading a lot.
Btw. instead of Wd8 in the game, white should play e6 to live. White still would have died if black had played e6 instead of g6 (it's the vital point). Of course in this game its enough for black to just live on the left side and killing the upper group. In Go it's no difference if you win with 100 points or just with 20 or even 0,5 points. But here black can finish the game in one streak.
Ahh, i hadn't noticed H5 after wF4, bF3, wH4 to win the semeai. Reading these sort of long chains out accurately is something I need work on. Thanks for the help.
Although, since white is only one liberty off in that case, he can connect the lower right up into the upper group by playing through A5, A7, B8, A9 through the semeai, giving life to the C12 group. Certianly doesn't end the game in one streak, though the game was really black's to begin with...
Post a Comment
<< Home